How to Set Up Your DeskMate 4.8
This guide starts with the unopened DeskMate bundle and walks you all the way through setting up and cycling the tank. I will show you what comes in the current BRS bundle, what you still need to buy, and what I would check before moving to the next stage.
Affiliate disclosure: The BRS product and video links in this guide are Impact affiliate links. If you make a purchase after following one, My First Fish Tank may receive a commission at no additional cost to you. I only recommend products that fit this build and explain why each one is here.
DeskMate 4.8 Setup Guide
The DeskMate is a compact acrylic all-in-one aquarium with the filtration hidden in a rear chamber. The current bundle gives you a strong head start, but it does not include every tool you need to set up, cycle, and maintain the tank well.
Confirm the current price and bundle contents at BRS before purchasing; packages can change over time.

Watch before you begin
Watch the DeskMate Overview
See the tank, package, and aquascape before you begin.
Matthew walks through the DeskMate system, what arrives in the bundle, and how the small aquascape comes together. The updated written stages below control the current setup instructions.
Complete the setup
Other Required Gear
Your kit comes with a lot, but here are the seven other things you’ll need to purchase to set up this tank.

Refractometer + Calibration Fluid
Accurate salinity is essential in 4.8 gallons. Calibrate the refractometer before use and recheck it regularly.

API Saltwater Master Test Kit
Testing for ammonia and nitrite will tell you when the nitrogen cycle is complete and it’s safe to add animals.

2.75-Inch NOSOK Replacement Kit
This replaces the original filter sock with a reusable screen, filter floss, or both, giving you an easier-to-clean mechanical filtration option.
BRS explicitly lists this kit as directly compatible with DeskMate aquariums.View at BRS

Dr. Tim’s Ammonium Chloride
You’ll use this in conjunction with nitrifying bacteria to cycle your aquarium.
Follow the bottle directions carefully; do not overdose a nano tank.View at BRS

AquaReady 3-Stage RO System
You can’t use untreated tap water in a saltwater aquarium. This three-stage RO filter will turn your tap water into super-clean water ready for your new saltwater aquarium. You can also purchase RO water from your local fish store or distilled water from your local grocery store.
This is an RO-only system with no deionization stage—test the output and decide whether your source water needs additional treatment.View at BRS

15-Inch AquaBlade Scraper
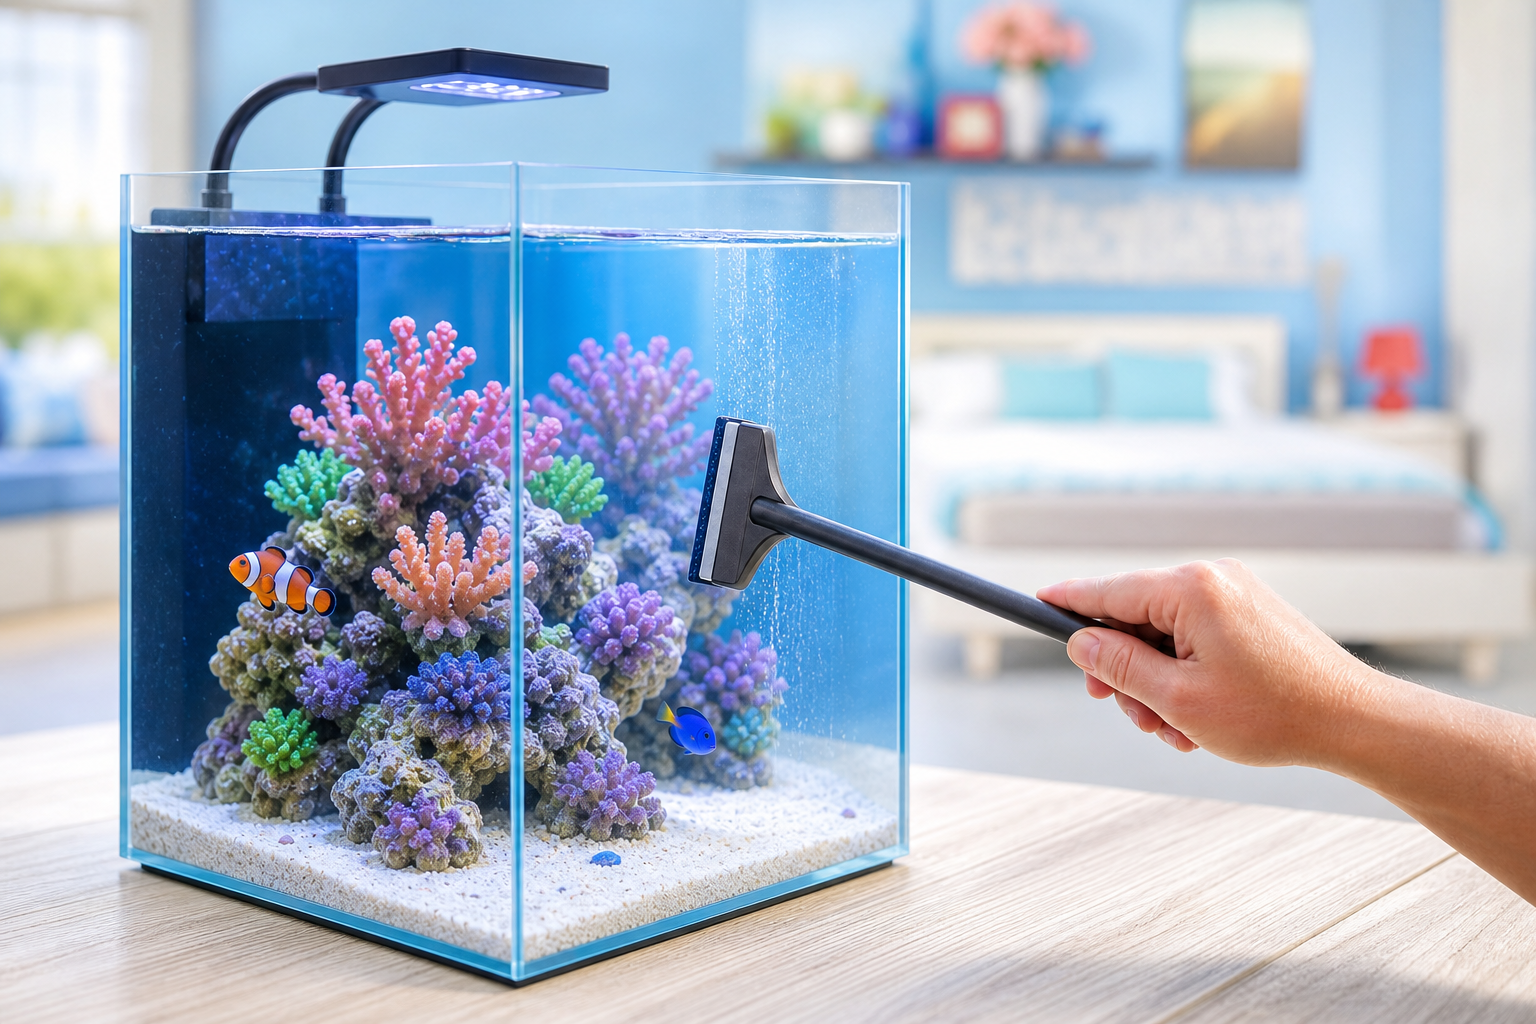
The longer solid handle lets you clean the DeskMate without putting your whole hand into the aquarium. Choose the acrylic model with the plastic blade and keep sand away from the blade.
Never use the metal-blade version on the acrylic DeskMate.View at BRS

1-Inch Pro-Clean Gravel Wash
The small siphon gives you control in a tiny display while removing water and loose debris during maintenance.
Choose the 1-inch Mini for tanks under 10 gallons.View at BRS
1. Plan, Unbox, and Dry Fit the Aquarium
By the end of this stage, the empty tank will be in its permanent location. Every part will be inspected and installed correctly. Your cord management will be complete, and you’ll be ready to add water.
Before you start
| Confirm | What you should have |
|---|---|
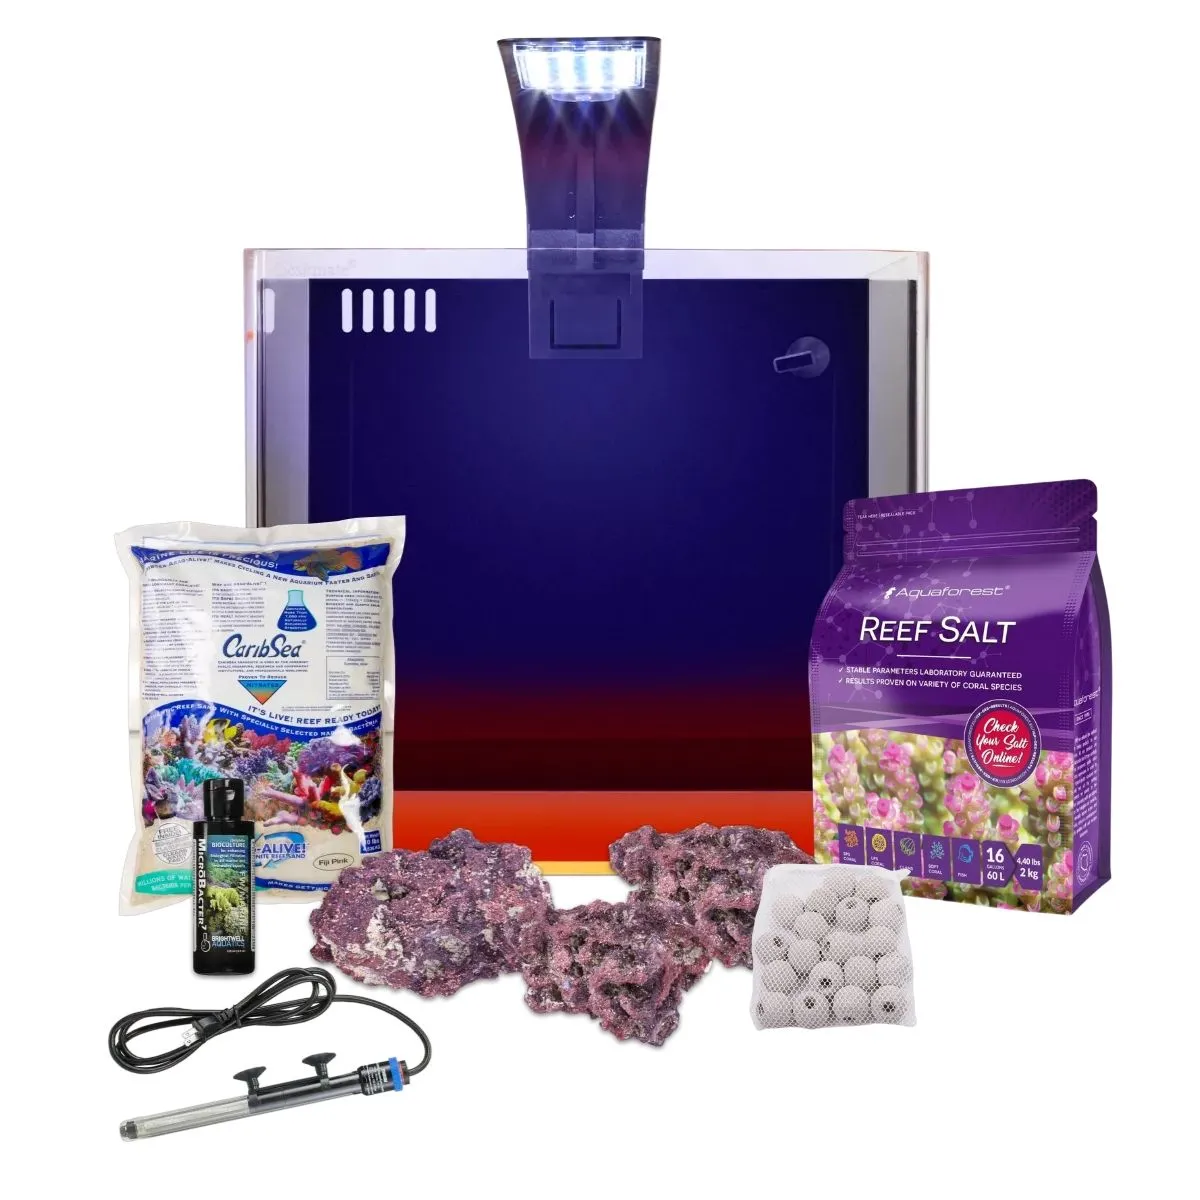
| Inside the current bundle | DeskMate CLASSIC aquarium, adjustable nozzle, return pump, Curve Lite LED, nano filter sock, LifeRock kit, Fiji Pink live sand, ceramic biospheres and mesh bag, 125 mL MicroBacter7, 25W Eheim Jager heater, and 2 kg Aquaforest Reef Salt. |
| Before operation | This is a small tank, so a sturdy table or desk will work fine as long as it is level, stable, water-resistant, and supports the entire aquarium base. Use GFCI-protected power where appropriate, make sure drip loops are installed in every cord, and position the power strip away from splashes and anywhere water could pool. Keep towels nearby. Do not place the tank directly against the wall; leave enough space between the tank and the wall to fit your arm comfortably and service the rear filtration chamber. |
| Before making saltwater | Have your filtered water ready. Use a clean five-gallon bucket designated for aquarium use only. Make sure your refractometer is calibrated, and have a thermometer ready—any reliable thermometer will do. |
| Before adding livestock | You’ll need to confirm that the nitrogen cycle is complete before adding any animals. |
Choose and verify the location
Set the empty aquarium where you plan to keep it. Confirm that the entire base is supported and the surface is level in both directions. Be sure that a little water spillage won’t damage anything around it, and be sure you can get your hand behind and around the tank for easy maintenance. Luckily, the DeskMate is small enough that if you ever need to move it, it is not that big of a deal.
- Keep it away from unstable furniture, direct sun, heating and cooling vents, and edges where it can be bumped.
- Keep plugs and power connections away from places where water could collect.
- If you are not confident about the furniture, floor, electrical outlet, or anything else supporting the tank, sort that out before you add water.
Unbox and inspect every component
Work on a clean, soft surface that will not scratch acrylic. Check the panels, bonded seams, orange base, rear chamber, nozzle, pump, light, sock, heater, rock, sand bag, biomedia, bacteria bottle, and salt bag.
- Do not use a metal blade, rough pad, or household cleaner on the acrylic.
- Photograph shipping damage before assembling or wetting the product.
- Confirm the bacteria and salt match the current bundle—not the older video.
- Keep the live-sand bag sealed until you are ready to aquascape and fill.
Dry Fit the Rear Chamber
Place the pump, nozzle, filter sock, biomedia, and heater in the rear chamber without plugging anything in yet. Make sure water can move through the chamber and that you can still remove the sock, heater, and pump later without taking the whole tank apart.
- Follow each equipment manual for orientation, minimum water level, and clearances.
- Do not force the heater or biomedia into a position that blocks flow or maintenance.
- Route cords so each one can form a drip loop and no plug must sit on the floor.
Gather the missing setup and testing supplies
The bundle includes a lot, but it does not include everything you need. You will still need a way to make saltwater, measure salinity and temperature, test the cycle, replace evaporated water, and handle normal maintenance.
- Make sure you have five gallons of purified water and a clean five-gallon container for mixing in the salt.
- Be sure your refractometer is calibrated for an accurate reading.
- Gather your ammonia chloride, nitrifying bacteria, and API test kit.
- Set aside dedicated towels, a small siphon or water-change tool, and a safe way to add purified top-off water.
2. Aquascape, Fill, and Tune Your DeskMate 4.8
Build rockwork that stays put and leaves room for flow and cleaning. Mix and measure the saltwater outside the aquarium, then fill the tank and learn what the normal running water level looks like.
Build the rock structure outside the tank
Use a clean towel or soft mat to protect the acrylic and rock. Try several arrangements with the two arches and smaller LifeRock piece before transferring anything into the aquarium.
- Keep the structure low enough to leave swimming room and future coral clearance.
- Leave space around the side and rear panels for an acrylic-safe cleaner.
- Preserve an open path for water to move around and through the structure.
- Do not rely on loose sand to stabilize a top-heavy rock stack.
Place the rock and add a maintainable sand bed
Move the finished rockwork into the tank carefully so it does not slide into the acrylic. Add a shallow layer of live sand that you can actually keep clean. You probably will not need the entire 10-pound bag in this tiny display.
- Follow the live-sand bag instructions; do not rinse it with tap water or let it dry.
- Keep sand out of the rear chamber and away from the pump.
- Do not bury the structure in a way that hides instability.
Mix the current Aquaforest Reef Salt
Use a clean five-gallon bucket to mix your saltwater. Measure out the correct amount of Aquaforest Reef Salt and stir it vigorously for several minutes until the water is clear. Test the salinity using your refractometer and make any adjustments until you achieve 35 parts per thousand or a specific gravity of 1.025.
- Calibrate your refractometer according to its instructions.
- Mix your saltwater to 35 parts per thousand or 1.025 specific gravity. Confirm the correct salinity using your refractometer.
- Record the amount of purified water and salt that produced the final measured result so future water changes are repeatable.
Fill slowly and tune the system
Use a cup to pour the water directly onto the aquascape. This will help disperse the water so you don’t overly disturb the sand bed and create cloudy water. Once the rear chamber reaches the correct operating level, start the pump and tune the nozzle.
- Confirm the pump stays submerged and the return chamber does not run dry.
- Set the heater according to its manual and verify actual temperature with the independent thermometer.
- Install the filter sock and biomedia so neither blocks flow or becomes impossible to remove.
- Mark or remember the normal operating water level. Evaporation will appear most clearly in the return area.
- Leave the light off during the initial cycling period unless the chosen cycle method specifically requires otherwise.
3. Cycle and Stabilize Your DeskMate 4.8
Do not call the tank cycled just because a certain number of days has passed. Use your test results, then make sure you can keep temperature, salinity, top-off, cleaning, feeding, and water changes consistent before you buy an animal.
Use the ammonia chloride and nitrifying bacteria to begin the cycle
The current bundle contains 125 mL of Brightwell Aquatics MicroBacter7. I also had you purchase Dr. Tim’s Ammonia Chloride. Following the ammonia chloride instructions, raise the tank’s ammonia level to the recommended level before adding the MicroBacter7 nitrifying bacteria. Use the API ammonia test kit to confirm the appropriate ammonia level. It’s not a big deal if the result is plus or minus 0.5 parts per million.
- This cycling method is clean and safe and doesn’t require the use of live animals or fish food.
- Do not combine bottled bacteria or ammonia products unless their manufacturers say they are compatible.
- Just be sure to follow the Dr. Tim’s Ammonia Chloride label as well as the Brightwell Aquatics MicroBacter7 label to properly begin the nitrogen cycle in your DeskMate 4.8-gallon tank.
Write down your cycle test results
Write down the date, ammonia, nitrite, nitrate, temperature, salinity, anything you added, and anything unusual you noticed. The point is to see what the tank is actually doing—not to wait for a date on the calendar and assume it is ready.
You will know your tank is cycling as the ammonia level decreases and the nitrite level increases. Your cycle is considered complete—and it is safe to add your first animals—once both the ammonia and nitrite levels have peaked and returned to zero. You will still have nitrate remaining in the tank, but we will manage that through routine water changes.
Get into a simple tiny-tank routine
The DeskMate’s open top and small volume make top-off and observation especially important. Replace evaporation with purified freshwater—not saltwater—because salt does not evaporate.
- Daily: check temperature, water level, pump flow, heater behavior, leaks, noise, and anything unusual. Top off with filtered water to the same mark.
- Several times each week: inspect and clean or swap the filter sock as needed; confirm the return chamber is not collecting debris or running low.
- Weekly: test the parameters appropriate to the tank’s stage, perform a consistent water change, clean acrylic with acrylic-safe tools, wipe salt creep, and inspect cords and equipment.
Do not choose the first animal until the tank is ready
A 4.8-gallon tank does not give you many livestock options. Before you buy anything, check its adult size, behavior, food, territory, waste, compatibility, and whether it can jump. Remember that the bundle does not include a lid.
- Add a cleanup crew only when the aquarium contains the food that specific animal eats.
- Add livestock gradually; do not treat a packaged “crew” or a gallons-based fish count as an automatic answer.
- Plan acclimation, quarantine or observation, disease response, and feeding before bringing the animal home.
- Use a species-appropriate lid when the stocking plan includes a jump risk.
Coral and anemones are separate decisions
The included light is meant for soft coral and some LPS, but that does not mean every coral will do well under it. Check the exact animal’s light, flow, placement, feeding, aggression, and stability needs. And no, an anemone is not the automatic final step of setting up this tank.
Popular next steps
Keep Learning
Continue with one of these popular beginner resources.