Saltwater Aquarium Tips for Beginners
Practical beginner advice for making a saltwater aquarium easier to manage and avoiding the mistakes that cause many first-year tanks to struggle.
Starting a saltwater aquarium can feel overwhelming, but success usually comes down to following a few simple habits consistently. These saltwater aquarium tips for beginners cover the practical lessons that will help you avoid common mistakes, choose equipment more carefully, and keep your first marine aquarium stable during its most important first year.
You do not need to master every fish, coral, or piece of equipment before you begin. Start with the basics, learn what your aquarium is telling you, and make small changes as the tank matures. The 16 beginner saltwater aquarium tips below are the lessons I would prioritize when setting up and maintaining a new tank.
1. Buy An RODI Filter
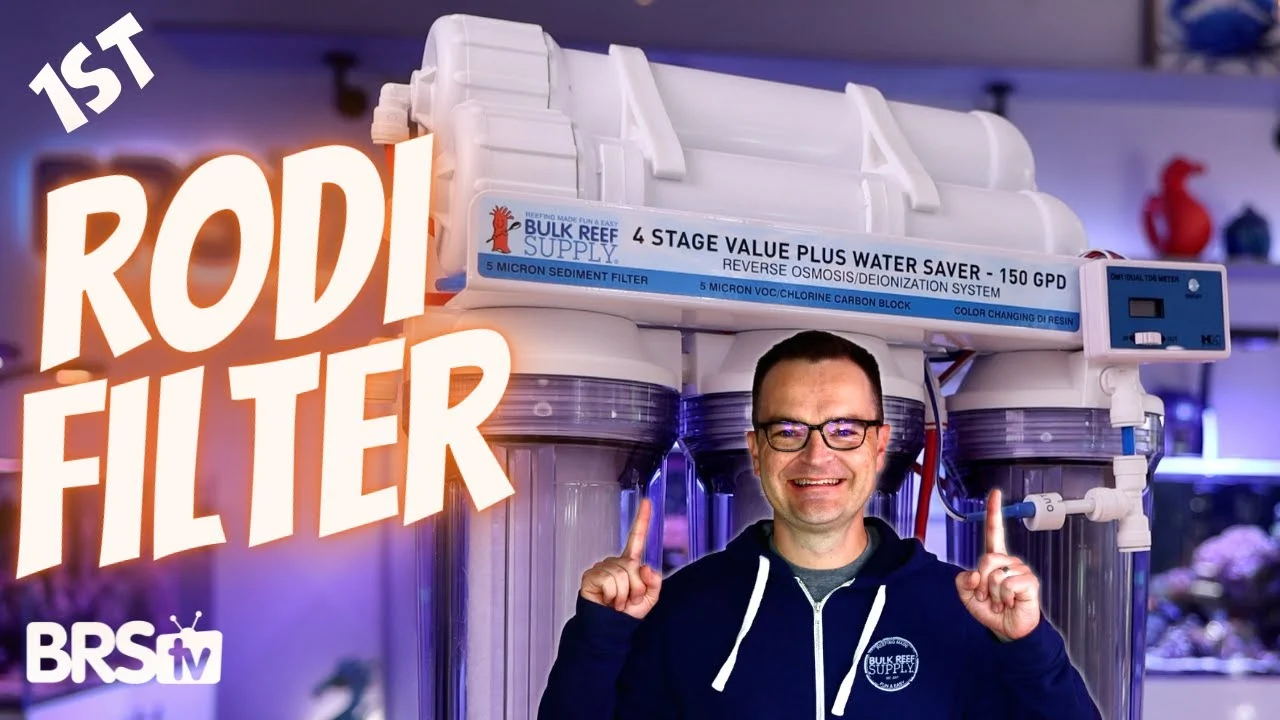
I can’t tell you how much money I have saved over the past decade by taking the step and purchasing an RODI filter. Yes, it can be daunting when starting out, but really, once you give it the time, RODI filtration is simple. You can install it outside on a faucet, or you can install it inside using one of your sinks. It pretty much just runs itself, and you only have to change out the different filter media every so often. Trust me, I know it can be intimidating if you’ve never done it before, but once you spend the hour to figure it out, you will save hundreds, if not thousands, of dollars in the first couple of years alone.
2. You Only Learn About Saltwater Aquariums By Doing
You can only research so much. I don’t know if you were like me, but when I started out, I read and read and read, and I watched tons of videos. I scoured different forums. Bulk Reef Supply YouTube had started a few years before. I remember watching newyorksteelo. I was inundated with too much information. And at some point, I just had to pull the trigger and start building my tank.
Think about it. If you want to learn to be any sort of professional or good at any sort of hobby, let’s take piano, for example. You can’t just read about how to play the piano. You actually have to sit down and play the piano. It’s the exact same with saltwater aquariums. You can learn a lot and do your due diligence beforehand, but at the end of the day, it’s only that hands-on experience that’s going to make you learn and grow in this hobby.
3. Test Your Water Every Week
Every single week, I test for alkalinity, salinity, nitrate, and phosphate. When I’m starting out a new tank and cycling it, I test every other day for ammonia, nitrite, and nitrate. To be honest, I rarely test for calcium or magnesium because I perform frequent water changes, and I know those numbers are generally tied to my alkalinity levels. So as long as my alkalinity is okay, I know the rest is okay as well.
You can’t just test weekly; you also have to record the results. The goal of any saltwater aquarium is stability, and you can only achieve stability by consistent water testing, writing down the results, and making changes slowly. I failed for almost ten years at keeping anemones because I didn’t understand how important stability was.
I have attached the Bulk Reef Supply Water Parameter Guide, but remember, you don’t need to hit these exact numbers. What’s most important is having consistent readings and a tank that looks healthy. If you can achieve those two things, then you will have succeeded. Below, I’ve also put a link to the exact test kits that I use every single week. If you don’t want to think about which test kits to buy, just get the ones below.

Hanna HI772 Alkalinity dKH Checker
This is the parameter I watch most closely in a growing reef. The digital dKH reading is fast and easy to compare from week to week.
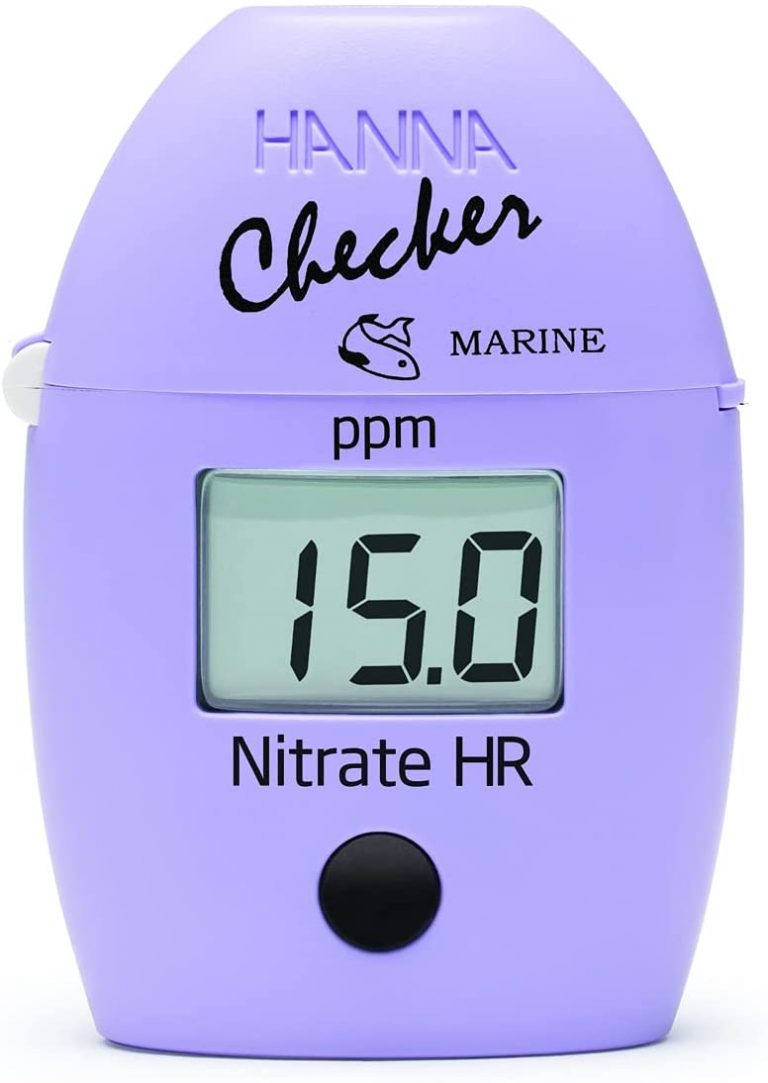
Hanna HI782 High Range Nitrate Checker
I use the HI782 for post-cycle nitrate trends. It is much easier for me to read consistently than a traditional color chart.

Hanna HI713 Low Range Phosphate Checker
This is the low-range HI713—not the ultra-low-range model. I use it to watch ordinary reef-tank phosphate trends without guessing at a faint color.

BRS Refractometer With Calibration Fluid
I use this simple handheld refractometer to check salinity. The included 35 ppt calibration fluid lets you verify it at the range where a reef tank actually runs.
4. Measure or Estimate Light Before Adding Corals
A PAR meter is helpful when you keep light-sensitive corals or need to compare lighting settings, but every beginner does not need to buy one. You may be able to borrow or rent a meter, or start with a proven schedule for your exact light and tank dimensions.
The goal is not to chase a perfect PAR number. It is to avoid placing livestock in clearly unsuitable light and then make slow, observable adjustments.

5. Start With the End Goal: What’s Your Dream Saltwater Aquarium?
What do you want out of a tank? I have said this for years now, going back over a decade of making videos on YouTube, but you need to know what your end goal is.
If you want something like a small, HelloReef tank, 15 gallons, that’s going to be something completely different than a 300-gallon behemoth that you want to put some baby shark into.
You need to know your goal so that you can build a tank appropriately. For me, I’ve built a ton of tanks in my life, and I’ve tried a whole bunch of different things, but the most satisfying for me at this stage in the hobby is something small, around the 15-gallon size.
So know your goal first, and then you can go about doing the research you need to succeed.


6. Every Animal Has a Different Diet
Every animal in your tank will have different dietary requirements. While an animal may eat whatever you put into the aquarium, that does not mean the food is good for it or will sustain it over the long term.
Just like human beings, I could eat Twinkies and cookies for every meal of the day, but that is not going to provide me with a long and healthy life. The same is true for the animals in your tank. They may eat a particular food, but that does not mean it is what is best for them.
Do your research and feed each animal what it actually needs. My beginner fish-food guide can help you compare your options.
7. Mistakes Are Opportunities to Learn
Not only will your first year include mistakes, but your first decade will include mistakes. When you make a mistake—and you will make a mistake—it doesn’t mean you’re bad at the hobby. The only thing that would make you bad at the hobby is if you make a mistake and then don’t learn from it. Every time something goes wrong and every time you make a mistake, take a minute, figure out what happened, and then make changes so you don’t make that mistake again.

8. Commit to a Weekly Water Change
Not only does a weekly water change remove toxins and refresh the water, but it is also built-in time that will keep you in contact with your tank. A weekly water change means that you essentially have to inspect everything inside your tank, including the gear, every single week. As a beginner, nothing could be more beneficial.
How many gallons you change each week will depend on several factors. But know this: even a simple 10% weekly water change will be hugely beneficial for your tank in the long run because toxins won’t be able to build up past a certain point.
If you notice your nitrates and phosphates keep creeping higher no matter what you do, all you need to do is increase your weekly water-change amount. That will likely help, if not solve the problem completely.

9. Use Two Heaters and a Temperature Controller
Most beginner tanks only need one properly sized heater. In the world of aquariums, more is not better when it comes to heater size. If an oversized heater accidentally fails in the on position, it can fry your inhabitants by raising the tank temperature way too high. A properly sized heater that fails in the on position will likely raise the temperature to a stressful level without necessarily killing your animals.
The easiest way to avoid these problems is to use an inexpensive temperature controller. I’ve used the Inkbird controllers shown below for many years. Wi-Fi options are available, but I typically rely on the audible alarm to alert me when my tank temperature is too low or too high.
Having a second heater is just for redundancy. Set the second heater to turn on three to five degrees below the normal tank temperature. That acts as a safety mechanism in case all else fails. Let’s say you’re gone for the weekend and your first heater fails. Your tank temperature would drop from 78 degrees to 74 degrees, and then the secondary heater would turn on, saving your tank from falling to an even colder temperature.
If you want to learn more about temperature controllers and heaters, check out the two Gear Guides below.

Temperature Controller Gear Guide
Compare the temperature controllers I recommend for independent heater protection, audible alarms, and optional Wi-Fi monitoring.

Aquarium Heater Gear Guide
Compare dependable aquarium heaters and choose the right wattage and form factor for your saltwater aquarium.
10. Stick to the Basics and Learn As You Go
Here’s what I mean by this. Don’t go out and buy every piece of gear you might need someday.
It’s really easy to do something like over-filter your water if you have multiple filter socks, a fleece roller mat, a macroalgae refugium, an oversized protein skimmer, an algae scrubber, ozone reactor, and a UV sterilizer. If you have all of these things and you put them in your tank day one, you’re going to over clean the water, and that’s going to spell disaster for corals.
Your fish are going to be fine with that, but your corals are absolutely not. Rather, start simple. You don’t need anything fancy. Start with simple filtration like a sponge or filter sock. Then, as you grow in this hobby, as your tank matures, as you water test and you find the areas where your tank is lacking, then you can add in filtration as needed.
Maybe it’ll be time for a protein skimmer, or maybe the best bet is going to be adding some sort of copepod refugium. You’ll figure that out as you go along. Just don’t add it all at the beginning. So stick to the basics, don’t overdo it at the beginning, and only tackle problems as your tank matures.
11. Buy DC Pumps & Wavemakers. AC Pumps Vibrate Annoyingly
DC pumps cost more than AC pumps. In most tanks, you are going to have both a return pump and a wavemaker. You might have some other pumps in there as well, but those are the primary ones and the ones that are going to be on all the time.
When you’re new to the hobby, the buzzing from AC pumps may not bother you, but as soon as you switch to a DC pump and it runs completely silently, it’s going to blow your mind because it’s just so much nicer.
Not only are DC pumps virtually silent, but they’re also controllable. And having a controllable pump is super handy for adjusting the flow, to getting it just where you want it, or for creating randomness in your aquarium, which is great for your anemones and corals.
Here’s our Wavemaker Gear Guide and here’s our Return Pump Gear Guide.

Wavemaker Gear Guide
Compare quiet, controllable wavemakers for producing broad, variable flow for your fish, corals, and anemones.

Return Pump Gear Guide
Compare dependable DC return pumps and choose the right flow rate and features for your aquarium system.
12. Choose Trustworthy Sources and Understand the Why
Use a small number of trustworthy sources, but do not follow any one person blindly—including me. Good guidance explains the reasoning, acknowledges tradeoffs, and changes when the evidence changes.
The problem is there is not one single method for maintaining a successful saltwater aquarium. There are probably 10, if not more, different methods, all of which would work if you followed them. The problem begins when you start mixing and matching methods. It may seem to make sense to you, but there are reasons each method follows a specific set of steps.
I have successfully kept saltwater aquariums for over a decade, but I have friends who set up and maintain their reef tanks in vastly different ways than I do. They’re not wrong, and I’m not wrong. Our methods are simply different. If you start mixing and matching between those methods, you can run into problems that neither method can solve because what you’ve done is create your own method.
13. Use a Mesh Screen or Lid
Typically when we’re talking about a screen, we’re talking about some sort of mesh. It allows for good air and gas exchange between the surface and the air, but it’s also going to evaporate quite a bit of water from your tank.
Whereas if you use a glass lid, you will cut down a lot on evaporation, but the tank will retain more heat.
Using a screen or a lid is just good practice to protect your fish. There are a ton of fish that are known jumpers: gobies and wrasses to name a couple, but there are other fish that aren’t known jumpers that will sometimes jump if they’re scared. Here’s a primer on beginner saltwater fish.
For example, I had this clownfish in one of my tanks for many years. No lid, no mesh screen, and no problem. One day I can’t find her, and sure enough, she jumped and was dead on the floor. It was awful.
So do yourself a favor, get a lid, a mesh screen, build one for yourself, have someone make it for you so that it looks nice, cuts down on evaporation a little bit, and also makes your fish safe.

14. Get What You Want the First Time
Buy for the aquarium you can responsibly afford and maintain now. Waiting can make sense when a compromise would leave you immediately replacing major equipment, but a smaller, simpler tank can also be the right long-term choice.
Price the complete system—not just the glass box—and leave room for salt, tests, food, maintenance supplies, livestock, and unexpected replacements.
15. Use UV for a Specific, Measurable Purpose
A UV sterilizer can be useful for specific goals, such as managing water-column algae or reducing the concentration of some free-floating organisms. It is not mandatory beginner equipment, and it does not replace quarantine, filtration, husbandry, or diagnosis.
Effectiveness depends on flow rate, exposure, bulb condition, and the organism you are trying to address. Add UV only when you understand the problem and can maintain the unit safely.

16. Use Velcro Cable Ties
Our final beginner saltwater aquarium tip… I learned this the hard way. Wire management, of course, is absolutely crucial. You’ll be shocked and dismayed with how many different cables it takes to run a small system. So in the past, I had used normal cable ties to keep my wires secured and cinched together.
But then you have to do one thing, maybe you have to change a heater out, maybe you need to clean a pump, and the only way to do that is to pull it off of your system and take it to the sink. But then you have to go through and cut all those cable ties.
And not only that, but I have hurt myself. I’ve had deep gouges in my skin from cable ties that I hadn’t cut perfectly.
Velcro cable ties are the answer. I buy huge packs of them and use them all around the house. Using Velcro cable ties not only will save your arms from getting cut, but they will allow you to make changes and do maintenance on your gear easily and whenever you need it.