

How to Set Up a JBJ RF-45 Saltwater Aquarium
This guide turns my JBJ RF-45 beginner video series into one written setup plan. We will start with the empty aquarium, build the system, cycle it using real test results, and add animals only after the tank—and your maintenance routine—are ready.
Affiliate disclosure: The Bulk Reef Supply product and episode links in this guide are Impact affiliate links. If you make a purchase after following one, My First Fish Tank may receive a commission at no additional cost to you.
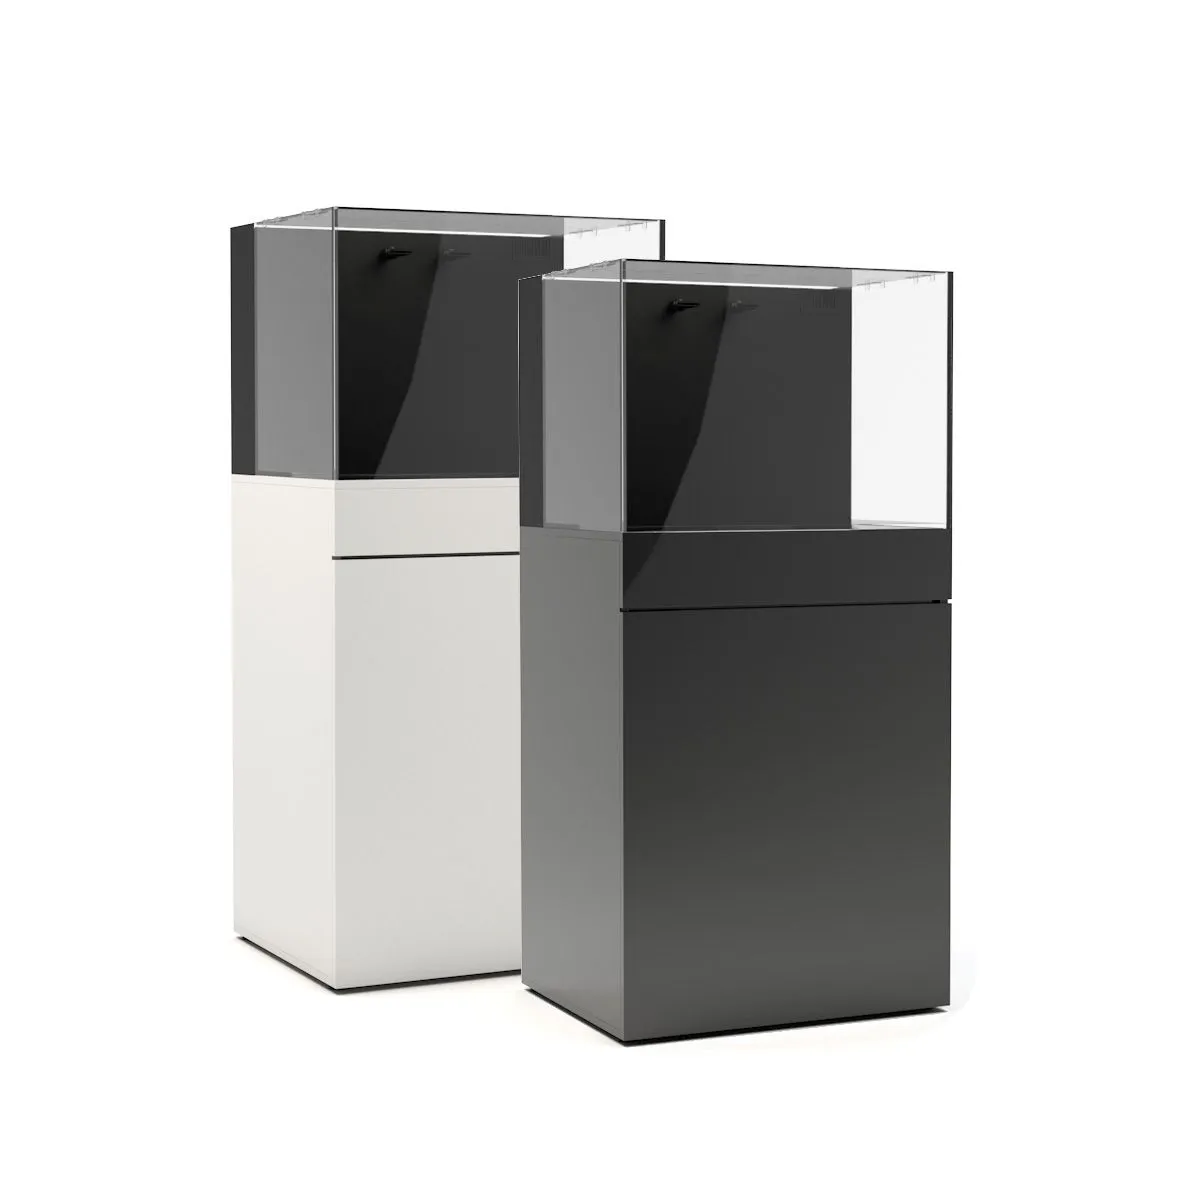
JBJ RF-45 tank overview
The roomiest beginner tank in this series
The JBJ RF-45 gives you much more room for rockwork, fish, and coral than the DeskMate or HelloReef. The tradeoff is that it needs a dedicated place in your home, more equipment, larger water changes, and a support plan for a filled system that weighs roughly 500 pounds.
- 45-gallon low-iron glass all-in-one aquarium
- Aquarium dimensions: 26.5 × 22 × 19 inches
- Matching stand: 26.5 × 22 × 36 inches
- Included: two return pumps, two filter socks, and flare nozzles
- Plan to add: lighting, heating, rock and sand, RO/DI water and salt, testing equipment, and maintenance tools
This is one of my pet peeves in the hobby because it’s so confusing. An all-in-one aquarium is simply an aquarium that contains a rear filtration chamber. It does not mean that it comes with all the gear necessary to start a saltwater aquarium. The selected package includes the aquarium, stand, two return pumps, two filter socks, and flare nozzles. You still need lighting, heating, rock and sand, RO/DI water and salt, salinity and cycle testing, mixing and maintenance tools, and livestock later.
Choose the Location, Inspect the Tank, and Plan the Equipment
By the end of this section, the empty aquarium should be level, safely supported, undamaged, easy to work around, and ready for the rest of the build.
My Way Series · Episode 1
- Be sure that the floor can support the weight of the final system, which is somewhere around 500 pounds. If you’re in an old house or an apartment building, you may want to hire a contractor to confirm that the floor can hold the weight.
- Don’t place the aquarium in a location where it will get a lot of direct sunlight, because that can not only cause heat fluctuations, but also a lot of nuisance algae growth. I would also keep the aquarium away from heat sources such as radiators and fireplaces. You also might want to consider placing it near a sink. That way your water changes will be easy.
- Inspect the glass, seams, stand, mat, pumps, socks, nozzles, cords, and included media before adding water.
- Center and level the aquarium on the supplied mat and stand. Don’t place the tank and stand directly against the wall. Be sure you can get your arm behind the tank, because there will be maintenance tasks that require you to access the rear of the tank.
- Plan GFCI-protected power where appropriate, drip loops, dry plug placement, and enough outlets without unsafe daisy chains.
Build Stable Rockwork and a Maintainable Sand Bed
Build rockwork with hiding places and swimming room, but leave enough space for water flow, cleaning, and future coral growth.
My Way Series · Episode 2
- It’s always best practice to build the aquascape outside of the tank. That way you don’t risk breaking or scratching the glass. Test several different aquascapes before you decide on the final one, and then use some epoxy and super glue to secure the pieces together.
- Be sure that there are enough nooks, crannies, and caves that even skittish fish can find a safe place to hide. Avoid making a giant wall of rock, as not only does it not look great, but it doesn’t allow spaces for your animals to call home.
- Be sure to leave enough space between the rockwork and the glass panels that you can easily fit an algae scraper. Also consider the flow pattern in your tank and try to make sure that water movement won’t get stuck anywhere, as that can lead to dead spaces where a lot of food and waste can build up.
- When you are adding the aquascape to the tank, be sure to place it directly on the glass bottom, not on top of the sand, as over time the aquascape will sink down into the sand, causing possible stability issues.
- I prefer a one-inch sand bed, but it’s really up to you. I certainly wouldn’t go more than two inches in depth.
Make Saltwater, Install the Heater, and Fill the Tank
By the end of section three, your saltwater will be mixed and added to the tank. The heater will be calibrated, the tank temperature will be steady, and all of your equipment will be operating correctly.
My Way Series · Episode 3
- Be sure to use either RODI water or distilled water for both making seawater as well as topping off your tank. Tap water just won’t work in this hobby.
- Use a five-gallon bucket to make your saltwater. Be sure that this bucket is only used for saltwater and not for other cleaning products. You can use a small pump to mix the salt for you, or just stir it up by hand. Follow the instructions on the salt mix, but be sure to use a refractometer to confirm the correct salinity of 35 parts per thousand or 1.026 specific gravity.
- I like to pour the water directly onto the aquascape. That way I don’t overly disturb the sand bed, creating a cloudy mess.
- Make sure you do not install the heater in the same compartment as the pumps, as that chamber can possibly run dry if something goes wrong. The heater needs to always be fully submerged and in a chamber that, even if something goes wrong, will still be full of water.
- Run both returns, inspect for leaks, confirm even overflow behavior, and mark the normal operating level so evaporation is obvious.
Cycle the Aquarium
Choose one fishless cycling method, follow its directions, and write down the test results with dates. The tank is ready for its first animals once the ammonia and nitrite levels have both spiked and then returned to zero. There will still be nitrate in the tank, but we will take care of that with water changes.
My Way Series · Episode 4
- Choose one complete cycling method and follow its current directions. I prefer using the clean cycling method where I actually add in ammonia chloride and then beneficial bacteria to eat the ammonia chloride. My favorite products are Dr. Tim’s Ammonia Chloride and Dr. Tim’s One and Only beneficial bacteria. I’ve used those to cycle an aquarium, and it takes less than two weeks.
- During the cycle, I will test for ammonia and nitrite every other day and record those results in a journal. That way I can be sure to see the trends and know when the nitrogen cycle is complete.
- During the nitrogen cycle, I typically remove the filter socks because I don’t want the beneficial bacteria to colonize on them. I also like to keep the lights off to avoid nuisance algae growth, but everything else I keep normal, such as the return pumps and wave makers.
Get ready for your first fish
There are a lot of different fish you can add to this tank, as long as you do it wisely. Make a stocking plan and introduce the fish slowly, being sure you have the right food for them and that you introduce them in an order that avoids aggression issues.
My Way Series · Episode 5
- Be sure to do your research for each fish you intend to add. Confirm what their adult size is going to be, because they will get bigger in your aquarium and they may outgrow your tank. Every fish species has a different temperament and dietary needs, so make sure you account for those before purchasing your fish. And remember, a lot of fish will jump, even if only occasionally. So I would highly recommend installing a mesh screen top to prevent any injury or death.
- Before purchasing the first animal, I highly recommend having an entire stocking plan. Know which fish you’re going to buy and the order in which they should be introduced to your tank. And even though I don’t quarantine in this video, it is always a good idea to prevent the spread of fish disease and illness.
- Don’t add all your fish at once. Add a few fish to begin with, and then make sure you’re testing the water frequently and making any adjustments necessary to keep your fish safe and your water parameters stable.

Beginner Saltwater Fish
Choose a beginner saltwater fish by adult size, tank footprint, diet, territory, social needs, and your complete stocking plan.

Fish Compatibility and Stocking Order
Plan compatible fish before buying by comparing adult size, territory, feeding, reef safety, and the order in which each fish enters the tank.

Acclimate and Quarantine a New Fish
Bring home a new saltwater fish with a clear plan for acclimation, quarantine, observation, and a safer introduction to the display tank.
Plan your livestock before you buy it
Use the video to understand the different kinds of animals you could add, but do not copy it as a shopping list.
My Way Series · Episode 6
- Fish: choose by adult size, behavior, compatibility, diet, and the aquarium’s existing social order.
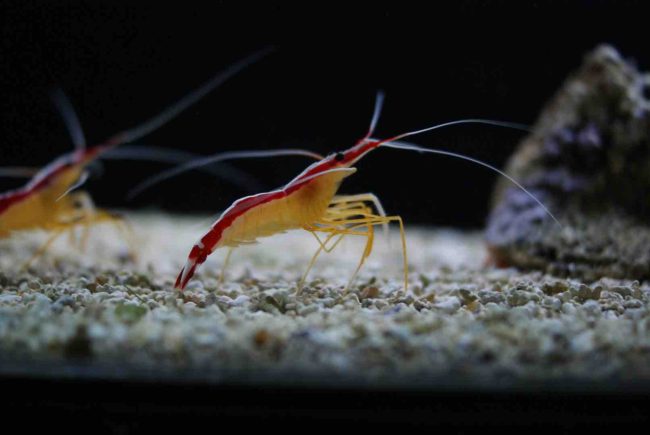
- Cleanup crew: Add only enough animals to address whatever issues exist in the tank. Don’t just add 10 snails because you think you should. Add 10 snails if there is a lot of algae growth you need controlled. And remember, each member of the cleanup crew has its own diet, so be sure there’s enough food for them.
- Coral: There are a ton of corals out there, and not all are great for beginners. So do your research using my blog below, and be sure to choose hardy beginner corals that meet your lighting and flow goals.
- Other invertebrates: check diet, reef safety, molting needs, compatibility, and whether the tank can support them.
- Leave time between additions and watch what happens. The aquarium sets the pace, not your shopping schedule.
Choosing a Cleanup Crew
Build your cleanup crew around the specific jobs your aquarium needs, then add only the animals your tank can support and feed.

Choosing a Beginner Coral
Compare beginner corals and choose a hardy option that fits your aquarium’s lighting, flow, space, and maintenance routine.

Bubble-Tip Anemone Care
Learn what bubble-tip anemones need, how to decide whether your aquarium is ready, and why stability matters so much.
Get the weekly maintenance routine working first
The video series showed upgrades before maintenance. I am reversing that order here because you should get the basic routine working before you add more equipment and more things that need cleaning.
My Way Series · Episode 8
- Observe animals and equipment daily. Confirm temperature, return flow, water level, and normal behavior.
- Top off evaporation with fresh RO/DI water and keep salinity consistent.
- Change or clean mechanical filtration before trapped waste breaks down.
- Perform a repeatable water change with matched temperature and salinity, and clean reachable detritus without destabilizing the system.
- Test the parameters that help you make a real decision, and write the results down often enough to see whether they are changing.
- Inspect pumps, heater, ATO, cords, and rear chambers on a schedule you can sustain.
Upgrading is optional, not necessary
Random flow nozzles, DC return pumps, controllable wave makers, and other upgrades are not required, but they may not only make your life easier, but make the hobby more enjoyable.
My Way Series · Episode 7
- Before making any upgrade, do your research to get the exact items you need.
- Even though some upgrades aren’t necessary, sometimes they sure are nice. For example, you don’t need to change out the included AC return pumps, but let me tell you, the vibration noise bugs the heck out of me, so I will always pay the money to upgrade to controllable DC return pumps, which always run whisper quiet.
- Keep the original equipment as a backup, because you never know when something’s going to break.
Add more animals slowly and in small batches
Anytime you add a new animal, it will upset the balance of the tank. So adding animals slowly will allow you time to make adjustments before there becomes a problem.
My Way Series · Episode 9
- Review the current animals, available space, territory, feeding, nutrient trend, and equipment capacity before every addition.
- Research the exact species—not only the broad category—and plan its adult needs.
- Use quarantine, observation, dipping, or acclimation appropriate to the animal and your disease-risk plan.
- Add slowly enough to notice cause and effect. Record dates and meaningful changes.
- Keep maintenance and emergency capacity ahead of the aquarium’s growing bioload.

How to Do a Water Change
Follow my complete saltwater aquarium water-change routine, from preparing the replacement water to restarting and checking every piece of equipment.

Build Your Maintenance Routine
Create a practical daily, weekly, monthly, and long-term maintenance routine that fits your aquarium and the time you actually have.
Choose a Compatible Fish
Choose saltwater fish by adult size, temperament, diet, swimming needs, and how each animal fits your complete stocking plan.