My favorite aquarium layout
Red Sea REEFER MAX Peninsula 350 G3: My 73-Gallon Saltwater Aquarium Build
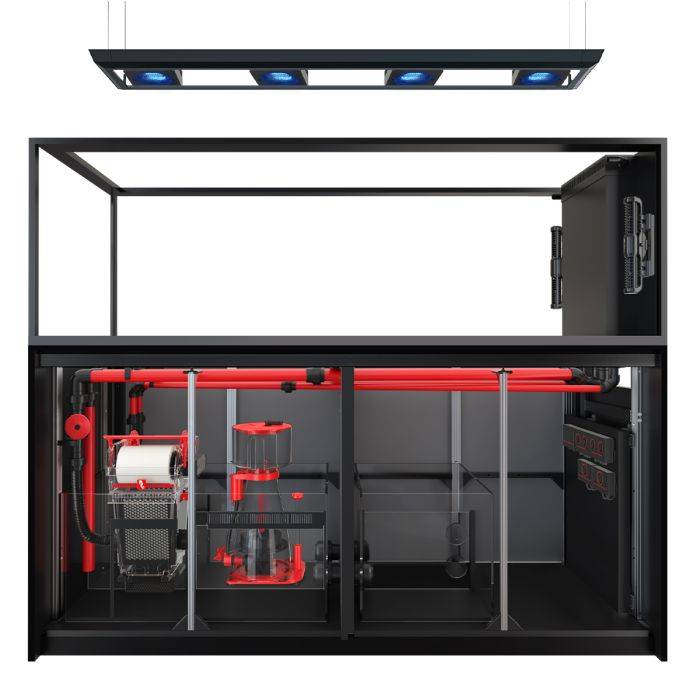
A peninsula is my absolute favorite aquarium layout. I currently keep my GloFish in an 80-gallon Waterbox peninsula, and my favorite tank I ever built was a 14-gallon Caribbean garden peninsula. If I wanted a larger premium saltwater system with that same two-sided view, the Red Sea REEFER MAX Peninsula 350 G3 would be high on my list.
This is how I would put this 73-gallon display together, what I like about the package, and the extra gear I would buy. My experience is with other peninsula aquariums; this is a proposed build, not a claim that I have personally set up this exact system.
My verdict
Two big viewing panels and a whole lot of included gear
What I love about a peninsula is that you get two large viewing panels instead of just one. You can walk around the aquarium and see your animals from different sides, which makes the whole tank more enjoyable to me.
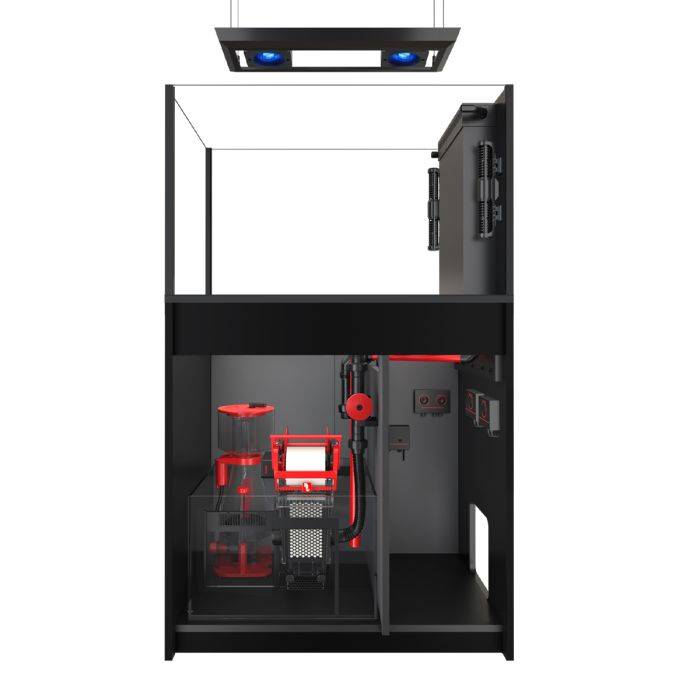
This system takes the matched equipment approach I like in the REEFER MAX 200 G3 and gives you a larger peninsula display. The lights, skimmer, two wave makers, DC return pump, fleece roller, and auto top-off system are already included. It is expensive, but you are getting a lot.
What comes with the aquarium
The big-ticket equipment is already here
You get the aquarium, matching cabinet, sump, pre-glued plumbing, and a complete set of Red Sea equipment. The display is 73.4 gallons; the sump adds roughly 19.7 gallons.
Red Sea REEFER MAX Peninsula 350 G3
The display measures 37.8 inches long, 25 inches wide, and 23.6 inches tall. The listed glass thickness is 0.59 inches, or approximately 15 mm.
- Aquarium and matching cabinet
- Sump and pre-glued plumbing
- Two ReefLED G2 115 lights
- Pendant trays and 30–39-inch pendant
- REEFER DC 600 protein skimmer
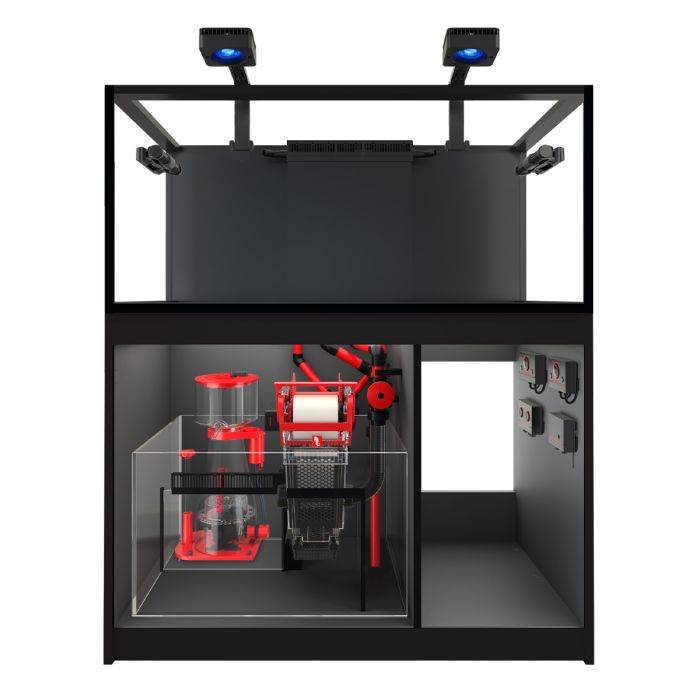
- Two ReefWave 45 gyre pumps
- ReefRun G2 6000 DC return pump
- ReefRun controller
- ReefMat 500 fleece roller
- ReefATO+ auto top-off system
- Slide-Out Control Panel 60
The freshwater reservoir, heater, and general-purpose Wi-Fi AC outlets are not included.
What I like
This is why I would choose the peninsula
For me, the layout is the biggest attraction. The included equipment is the other big reason this package makes sense.
You can enjoy both long sides
I like seeing the aquarium from more than one direction. With both long panels exposed, the aquascape has more than one front, and the animals have more places where you can enjoy watching them. I would leave room to walk along both sides.
Two gyre pumps are included
I really like how the pictured pumps sit vertically against the internal overflow end of the tank. It keeps that equipment concentrated at one end instead of hanging on the main viewing panels. I would be curious to see how the flow works around my own aquascape and adjust the settings from there.
DC pumps and a matched skimmer
The controllable DC return pump is a big plus. I also like getting a DC skimmer with adjustable pump performance, rather than having to choose one separately. I can tune the skimmer to the system and adjust the wetness of the skimmate using its controls.
A separate cabinet compartment
Unlike a small cabinet that is almost entirely filled by the sump, this one has a separate compartment. That gives me a much better starting point for a freshwater reservoir and an organized equipment area, although the exact fit still needs checking.
What I would plan around
A few things to think about before buying
I love the layout, but this is still a substantial aquarium with some installation decisions to make.
The lights need to be suspended
The two ReefLED fixtures sit in a pendant assembly so they look like one fixture. Plan for ceiling mounting with the included hanging arrangement. Getting it securely mounted, centered, and level takes some effort. If you are not comfortable doing that, I would hire someone who is.
I would prefer an external overflow
An external overflow would leave a little more uninterrupted space inside the display. This system uses an internal overflow. The upside is that the pictured vertical wave maker arrangement keeps the gear tucked together at that end, which I think looks really nice.
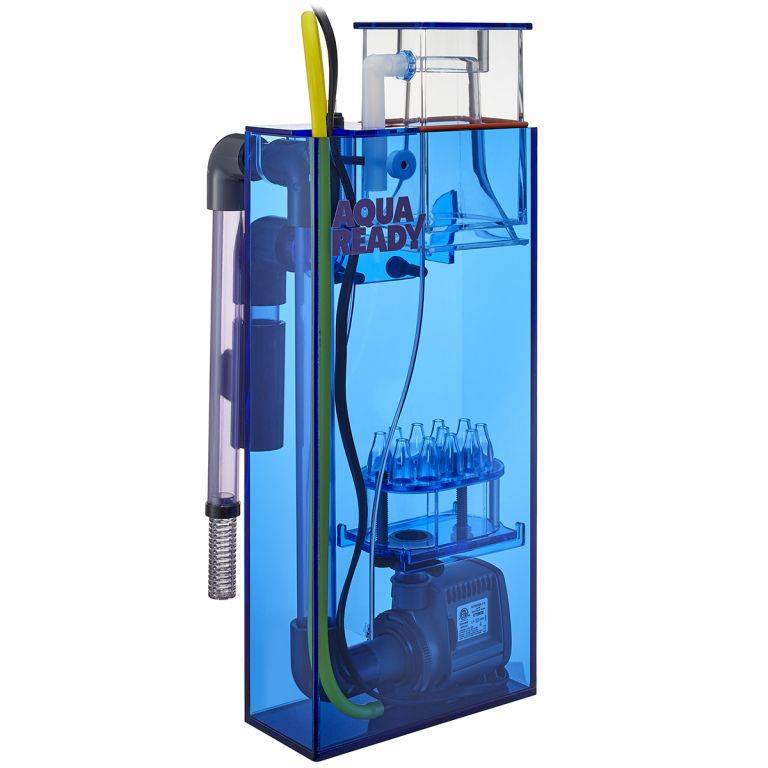
I still prefer acrylic sumps and bar lights
The glass sump works with the included equipment, but I personally like the lighter weight and layout options of acrylic sumps. The two ReefLEDs are good lights, but puck-style lighting can still create shadows as colonies grow. Supplemental bars are something I could consider later—not a day-one requirement.
Plan the room, not just the footprint
Leave space along both viewing panels and enough access to work in the cabinet. This is a heavy system once it is full. Confirm the support, electrical access, ceiling mounting, and water-change route before the aquarium arrives.
ReefBeat control does not mean Wi-Fi outlets are included
The included Red Sea smart equipment works through ReefBeat, and the ReefRun controller operates compatible pumps. The package does not list a ReefControl Pro or ReefControl Power 8. The slide-out control panel is a mounting surface for electronics, not a controllable outlet strip.
I would start with the Inkbird to control the heater. Later, I would consider ReefControl Pro and Power 8 Deluxe for additional monitoring, controllable outlets, and coordinated feeding and maintenance routines.
Other items you will need to purchase
The rest of my shopping list
You do not need to buy another light, skimmer, return pump, wave maker, fleece roller, or ATO system. Here are the other items I would add. Choose the size named on each card when the product page offers multiple versions.

Innovative Marine Aqua Gadget 15-Gallon Hydrofill Reservoir
For a system this size, I would choose a 15-gallon reservoir. I like the pull-out refill drawer and the easy-to-see water level. It measures 18.2 × 12.2 × 23 inches. The cabinet dimensions suggest a possible fit, but confirm the opening and service clearance before ordering.
View the 15-Gallon Reservoir at BRS
BRS 300-Watt Titanium Heater Element
I would use the 300-watt version for this approximately 93-gallon system. It requires a separate temperature controller, so pair it with the Inkbird below. Confirm the heater sizing against your room temperature and keep it submerged in a suitable sump chamber.
View the 300W Heater at BRS
Inkbird ITC-308 WiFi Dual-Stage Temperature Controller
This controller switches the heater on and off to maintain your chosen temperature. It also has high and low temperature alarms, WiFi monitoring, and a separate cooling outlet if you add a fan or chiller later.
View the Inkbird ITC-308 WiFi at BRS
Refractometer with Calibration Fluid
Use this to mix new saltwater and confirm the aquarium stays at the right salinity. Calibrate it with the included 35 ppt solution before relying on the reading.
View the Refractometer at BRS
Python 2-Inch Large Pro-Clean Gravel Wash
Choose the Large version with the 16-inch gravel tube, not the Medium with its 10-inch tube. I would use the longer tube for water changes and sand cleaning in this deeper aquarium. The BRS page lets you select the size.
View the Gravel Wash at BRS
Flipper EDGE Max Magnetic Algae Cleaner
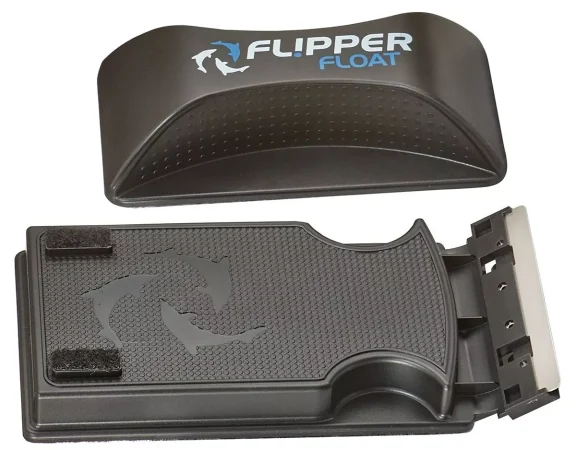
The aquarium has approximately 15 mm (0.59-inch) glass. The EDGE Standard is rated up to 12 mm, so I would choose the Max, rated up to 24 mm. Both EDGE sizes have dual blades; I like that design for quicker cleaning. Keep the blades away from silicone seams.
View the Flipper EDGE Max at BRS
HelloReef Stick-On Thermometer
This simple thermometer stays outside the aquarium and gives you a quick temperature check every time you walk by.
View the Thermometer at BRS
API Saltwater Master Test Kit
Testing ammonia and nitrite tells you when the nitrogen cycle is complete and it is safe to begin adding animals.
View the API Test Kit at BRS
Dr. Tim’s Ammonium Chloride
This gives you a measured ammonia source for a clean, fishless cycle. Follow the label carefully and confirm the dose with your ammonia test.
View Ammonium Chloride at BRS
Dr. Tim’s One & Only for Saltwater
Add the nitrifying bacteria after dosing ammonia chloride. Choose a bottle sized to treat the full water volume of this approximately 93-gallon system, including the sump, and follow the label.
View One & Only at BRS
BRS 4-Stage Value Plus 75 GPD RO/DI System
For this build, I would buy a full RO/DI system. It gives you clean water for mixing saltwater and for every future top-off.
View the RO/DI System at BRS
Tropic Marin Pro Reef Salt
This is the salt mix I would use for the build. Mix it with RO/DI water and use the refractometer to verify salinity before adding it to the tank.
View Tropic Marin Pro Reef Salt at BRS
CaribSea Original Grade Ocean Direct Live Reef Sand
I would plan on about 60 pounds—three 20-pound bags—for this aquarium. You may use less if you prefer a shallower bed. Add the sand to the depth you actually want, rather than feeling obligated to empty every bag.
View the Live Sand at BRSMeasure before committing to the reservoir
Red Sea lists the separate compartment at about 12.6 inches wide, 23.4 inches deep, and 29.9 inches high. The Hydrofill is 12.2 inches wide, so the nominal dimensions suggest it may fit with its narrow side across the compartment. That leaves very little side clearance. Confirm the door opening, refill drawer movement, tubing, and slide-out electronics panel before ordering. This is a dimension check, not a confirmed installation.
Rock and aquascape
Build something that looks good from both sides
I would buy around 80 pounds of Original LifeRock and add a couple of arches. The smaller options below are just that—options. Try the design outside the tank first and do not pack every piece into the display.

CaribSea LifeRock Dry Live Rock — 40 Pounds
I would start with two 40-pound boxes, giving me 80 pounds to choose from. You could buy up to 100 pounds if you want more choices, but do not use extra rock just because you bought it. Leave room for swimming, cleaning, and coral growth.
View LifeRock at BRS
CaribSea Arches LifeRock Dry Live Rock
I would work a couple of larger arches into the design. This product is sold as a 20-pound box, typically with four arches, so one box gives you pieces to choose from. Use the two that work best and save the rest if you do not need them.
View LifeRock Arches at BRSOptional smaller pieces

CaribSea Nano LifeRock — 10 Pounds
Optional: one 10-pound box gives you smaller pieces for filling out the aquascape and creating little nooks and crannies. I like having those choices, but you do not have to buy this as well as every other rock option.
View the Nano LifeRock at BRS
CaribSea LifeRock Nano Reef Kit
Optional: this kit includes two nano arches and a small piece of Original LifeRock. It is another way to add smaller shapes to the aquascape without committing to another large box of rock.
View the Nano Reef Kit at BRS
CaribSea LifeRock Nano Arches
Optional: the four smaller arches in this pack give you more ways to create caves and swim-throughs. Choose this or the Nano Reef Kit if you want smaller accents; neither is required to make the main aquascape work.
View the Nano Arches at BRSSecure the aquascape
Super glue and coral adhesive
I would buy both of these before assembling the rockwork. Build and test the structure outside the aquarium, and let the joints set before moving it into place.

BRS Extra Thick Gel Super Glue — 10 Ounces
I would use this extra-thick gel to secure small rock contacts and attach coral frags. The 10-ounce bottle gives you plenty to work with while building the aquascape. Start with a stable structure rather than relying on glue to hold an unsupported pile of rock.
View the 10 oz Super Glue at BRS
Tunze Coral Gum Instant — 400 Grams
Choose the 400-gram version. This fast-setting, two-part coral adhesive is useful for securing small aquascaping pieces and coral mounts. Mix and use it according to the instructions, and check that each joint is secure before moving the structure.
View the 400 g Coral Gum at BRSOptional upgrades
The controller setup I would consider later
These are not purchases I would make right away. Once the tank is running, I like the idea of having more of its monitoring and power control together in ReefBeat.

Red Sea ReefControl Pro
An optional way to go deeper into the ReefBeat ecosystem. This package includes a pH and temperature probe and supports additional compatible sensors. It does not include an AC outlet strip; pair it with ReefControl Power if you want it to switch mains-powered equipment.
View ReefControl Pro at BRS
ReefControl Power 8 Deluxe with Control Panel
This adds eight controllable AC outlets and physical buttons for maintenance. For automatic heater control, you also need a compatible temperature-reading setup, such as the ReefControl Pro and its included probe. Power 8 can also use a separately purchased ReefSense Temperature Probe directly.
View Power 8 Deluxe at BRSKeep heater control in place. ReefControl Pro does not have general-purpose AC sockets. To control the titanium heater through Red Sea, you need the appropriate power hardware, a compatible temperature-reading setup, and correctly configured settings. The Inkbird remains my straightforward starting choice.
Plan the full cost
This is a premium 73-gallon build
BRS lists the aquarium package at $6,299 as of September 5, 2026. That is before the reservoir, heater, controller, RO/DI system, testing and maintenance supplies, salt, sand, rock, and animals.
The included gear makes the shopping list much simpler, but it does not make this an inexpensive aquarium. Price the complete build before buying, and keep the optional controllers and extra rock choices separate from what you need to get started.
Compare before you decide
Want the same idea in a smaller system?
My REEFER MAX 200 G3 build gives you a smaller display and a sump with much of the same matched-equipment approach. Or explore all seven builds to find the layout and budget that fit you best.