This week, we’ll start the biological filter without risking a fish, learn what the test results mean, and practice the small jobs that keep a 15-gallon aquarium stable.
This is the point where it gets really tempting to rush. The tank is full, the pump is running, and the water may look perfectly clear. It feels like something should be living in there already.
Unfortunately, clear water does not tell us whether the tank can safely handle animal waste. Neither does waiting a certain number of days or adding a bottle of bacteria. We have to follow the cycling method and use the test results to find out when the biological filter is ready.
We will start a fishless cycle, write down the test results, manage evaporation, prepare replacement saltwater, deal with the early ugly stage, and practice the routine before the first cleanup animals arrive.
Affiliate disclosure: This article contains an affiliate link. If you purchase through it, My First Fish Tank may earn a commission at no additional cost to you. The HelloReef kit is included because it is the exact aquarium path discussed here.
Where Week 3 begins: This public video starts with Week 2’s water and equipment setup. The cycling section—and this week’s subject—begins at about 5:05.
What Cycling Actually Accomplishes
Fish food, animal waste, and other decaying organic material release ammonia. Ammonia can harm aquarium animals. A functioning biological filter contains communities of nitrifying bacteria that convert ammonia into nitrite and then convert nitrite into nitrate.
Cycling does not make the aquarium permanently immune to ammonia. It establishes enough biological capacity for the planned first addition. Stocking gradually and protecting the biological media remain important afterward.
Choose One Fishless Method and Follow It Completely
A fishless cycle establishes the biofilter without deliberately exposing a live fish to ammonia or nitrite. The HelloReef path uses bottled nitrifying bacteria and a controlled ammonia source. Other methods exist, but mixing pieces from several methods creates confusion and makes the results harder to interpret.
Use the current instructions on the exact bacteria, ammonia source, and test kits you own. Product concentrations change. Test kits report different forms and scales. An old online dose copied without context can produce far too much ammonia.
- Confirm the real aquarium water volume after displacement by rock and sand.
- Check the bacteria’s storage and expiration guidance before use.
- Use a controlled aquarium cycling product—not household ammonia.
- Have ammonia and nitrite tests before adding the nutrient source.
- Follow the manufacturer’s filter-sock, UV, skimmer, or other equipment instructions during the initial bacteria period.
- Never add more ammonia simply because the test did not display the exact number you expected.
Keep a Cycle Log Instead of Trusting Your Memory
Testing becomes much more useful when you can see the trend. Write down the date, time, ammonia, nitrite, nitrate when used by the method, pH if the method calls for it, temperature, salinity, additions, water changes, and anything unusual.
| Record | Why it matters |
|---|---|
| Ammonia | Shows whether the initial waste source remains and whether the first bacterial step is keeping pace. |
| Nitrite | Shows whether the second bacterial step is processing the intermediate nitrogen compound under the chosen method. |
| Nitrate | Can help show that nitrogen is moving through the cycle and may help you plan the water change before adding animals. |
| pH | A substantial drop can slow nitrification and may explain a stalled cycle. |
| Temperature and salinity | Confirm that the basic environment remains stable while the bacteria establish. |
| Everything added | Prevents accidental repeat dosing and makes unexpected results easier to diagnose. |
Do not react to one surprising result by pouring in another product. Retest carefully, confirm the kit directions, check the expiration date, and look at the complete trend.
Let the Test Results Tell You When the Cycle Is Finished
The cycle is complete when the exact method’s confirmation test passes—not when the calendar reaches a certain day. For the current DrTim’s fishless method, the manufacturer describes a final controlled ammonia challenge followed by ammonia and nitrite falling below its stated completion thresholds within the next-day window.
Your tests, units, and product instructions must match that method. If the readings remain elevated, the aquarium is still processing the input or something has stalled. Wait, investigate, and retest. Do not add animals to make the test more exciting.
Manage Evaporation Before It Manages You
Water evaporates from an open aquarium. Salt does not. As freshwater leaves the system, salinity rises and the water level falls—most visibly in the return-pump chamber.
Replace evaporation with purified freshwater only. Add enough to return the system to the same normal operating mark established during Week 2. Never use saltwater for ordinary top-off; that would add more salt every time and drive salinity upward.
At first, check the level every day. The amount will change with room temperature, humidity, airflow, and season. Once you know the pattern, you can decide whether manual top-off remains practical or whether a carefully installed and tested automatic top-off system would improve stability.
Prepare Replacement Seawater Before You Need It
A small reserve of mixed seawater turns a routine water change—or an unexpected cleanup—into a manageable job. Use the general Week 2 mixing process: dedicated clean container, purified water first, current salt instructions, complete circulation, measured salinity, and appropriate temperature before use.
Store it in a clean, securely covered container that cannot be mistaken for household water. Before using stored seawater, check for contamination, confirm salinity, and match temperature closely enough to avoid an abrupt change in the aquarium.
Different salt mixes have different storage recommendations. Follow the current manufacturer guidance instead of assuming every mixture can sit heated and circulating indefinitely.
Expect the Early Ugly Stage
Brown film on the sand or rock is common in a new aquarium. Diatoms are one likely cause, but not every brown growth is automatically a harmless diatom bloom. The correct response begins with observation, not panic.
- Photograph the growth in consistent lighting so you can compare changes.
- Confirm source-water quality, lighting schedule, flow, temperature, and salinity.
- Do not add random chemicals simply because the aquarium looks unattractive.
- Do not buy a large cleanup crew before confirming both the cycle and the actual food available.
- Investigate if the growth forms strings, traps bubbles, spreads unusually fast, smells bad, or does not behave like the expected early film.
New aquariums mature through stages. Some unattractive growth is part of that process. The goal is not to make the tank look mature overnight; it is to notice what is happening and respond proportionally.
Practice the Routine While the Stakes Are Low
This waiting period is valuable because equipment and habits can fail before an animal depends on them. Use the time to make the following tasks repeatable:
- Check temperature, normal water level, pump flow, and leaks every day.
- Top off with purified freshwater to the same mark.
- Measure salinity consistently and clean the instrument correctly.
- Inspect mechanical filtration and clean or replace it as needed.
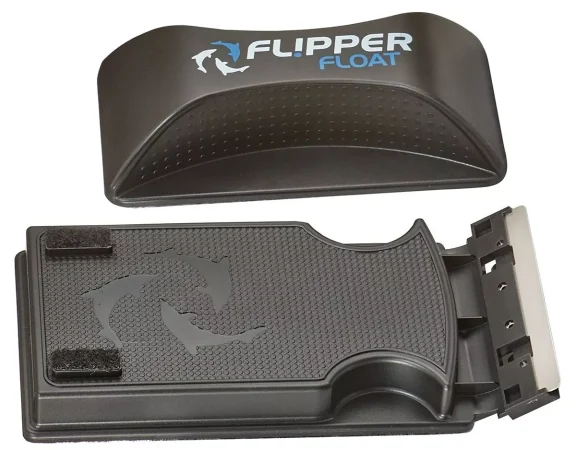
- Clean exterior glass with aquarium-safe practices and no sprayed household cleaner near the tank.
- Remove salt creep before it interferes with equipment or cords.
- Keep the test log current and note any equipment noise or behavior change.
Waiting does not mean doing nothing. Use this week to make sure the aquarium stays stable while you go through an ordinary week of work, meals, sleep, and everything else life throws at you.
Before You Add Any Animals
- One fishless cycling method was selected and followed with the current product instructions.
- The bacteria and nutrient source were stored, measured, and used correctly.
- Ammonia and nitrite results are recorded with dates and units.
- The final test required by the cycling method passes within its stated window.
- Temperature and salinity remain stable through normal daily operation.
- Evaporation is replaced with purified freshwater to the same operating mark.
- The return pump remains submerged and operates without air bursts.
- Replacement seawater can be mixed, stored, measured, and temperature-matched safely.
- Early algae or film is being observed and identified rather than treated blindly.
- The daily and weekly routine is realistic enough to continue after animals arrive.
Next: Add a Cleanup Crew With a Real Job
In Week 4, we’ll choose a small cleanup crew based on what the tank actually needs, look for healthy animals, plan their arrival, and make sure they have enough to eat.
Keep the Public Guide and Complete Course in Their Proper Roles
This article gives you the cycling basics and explains what to watch. The HelloReef kit includes the complete course with more than 50 detailed videos, including the exact kit-specific demonstrations and deeper troubleshooting.
If you still need to add water or finish setting up the equipment, return to Week 2. You can also review recommended saltwater aquarium parameters and the three beginner aquarium options.
View the HelloReef kit and complete course at Bulk Reef Supply.